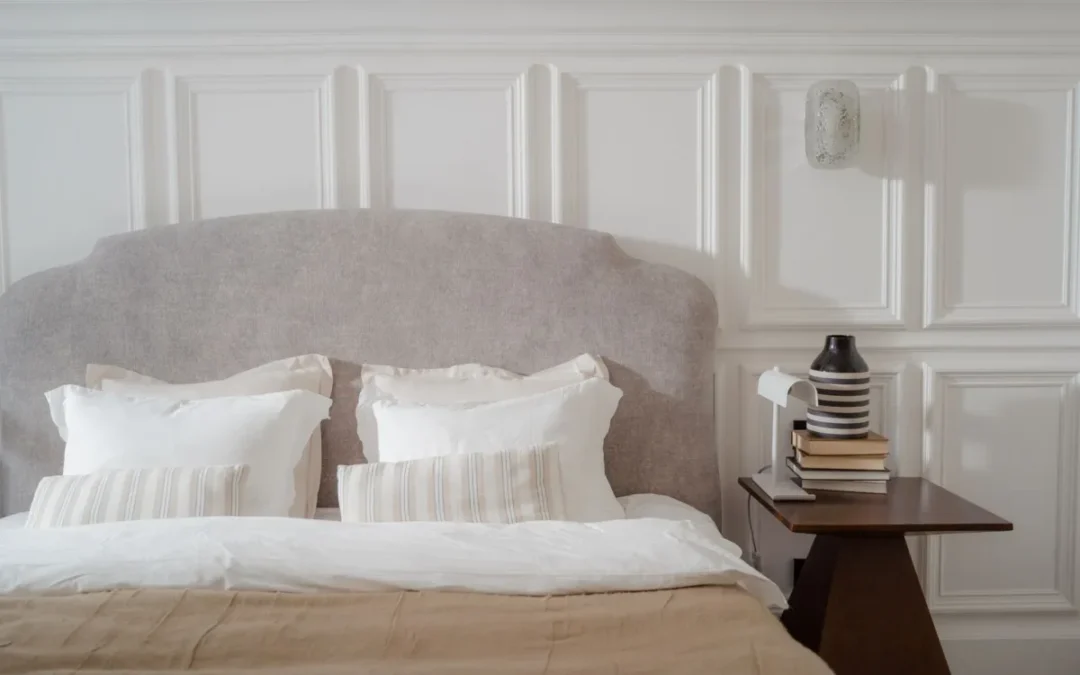
The bedroom panelling ideas that last are usually the plainest: a simple profile, a height that suits your ceiling, and one paint colour or a close neighbour of it. Start with the wall behind the bed, where the headboard already gives the panelling a job to do. Live with it for a few weeks before you touch another wall. Bolder schemes can wait.
Which panelling style suits a bedroom?
Five styles cover nearly every bedroom, and the choice usually follows the age and proportions of the house. A Victorian or Edwardian room with a tall ceiling can carry board and batten or picture-frame moulding without strain. A 1930s semi or a low new-build ceiling tends to suit shaker panelling, because its flat, square frames stay quiet in a small space. Tongue and groove belongs in a cottage, a loft room or a coastal scheme, while slatted panelling looks modern and gives a headboard wall some rhythm without much fuss. Whichever you pick, keep the scale in step with the wall: wide, heavy panels swamp a small room, and very fine ones look busy on a large wall. Sketch the layout to scale on paper first, so you know how many panels will really fit between the corners and the window.
- Shaker or box panelling: flat, square-edged frames
- Tongue and groove: narrow interlocking vertical boards
- Board and batten: wide boards, slim strips
- Slatted panelling: thin slats, narrow gaps
- Picture-frame moulding: rectangles of applied moulding
Starting with the wall behind the bed
Why begin here? Because the bed wall already has a job. The headboard sits in front of it, the eye lands there first, and everything else in the room can stay plain. You can run the panelling the full width of the wall or stop it a little wider than the headboard on each side. The narrower run keeps the bed looking grounded, while the full width feels built in and suits a room with fitted wardrobes on either side. Lighting matters as much as the boards. A pair of wall lights or bedside lamps close to the panelling will graze the profiles and throw small shadows, which is what makes a plain painted panel look richer than it is. Check how much the headboard will hide, too: a tall upholstered one covers the top rail, while a low one leaves the whole pattern on show.
How high to take the panels
Height decides whether panelling looks planned or tacked on. As a guide, half height means roughly 900–1,000mm on a standard 2.4m ceiling, measured from the top of the skirting rather than the floor, and it is the safest choice in a small bedroom. Two-thirds height, about 1.6m on the same ceiling, often clears the top of a headboard and gives the bed wall real presence. Full height runs to the cornice or ceiling. It can feel heavy in an ordinary room unless the profile is slim, so it suits tall Victorian ceilings better. Before you commit, mask a line at each height and look at it from the doorway. Notice what the line crosses. Switches and sockets often sit at 300–450mm or 1,000–1,200mm, and window sills at around 900–1,000mm, and a panel edge that slices through either looks accidental. Nudging the line up or down by a few centimetres usually solves it.
Is MDF good enough, or should you use timber?
For a dry bedroom, standard MDF is usually good enough, and it is what most painted panelling is made from. The surface is smooth, it takes paint evenly and it generally costs less than solid timber. The cut edges are the awkward part: they soak up paint, so fill and sand them before the first coat. Moisture is the real weak spot. Keep any wood-based panel dry, and in a damp room such as a bathroom look for a moisture-resistant grade, which is made for humid interiors but is still not waterproof. Solid timber or plywood is tougher and holds fixings better, which matters if you plan to hang a heavy mirror or shelves from the panelling. It costs more and moves a little with the seasons, so let it sit in the room for a few days before fitting. Buy slightly more than your measurements say, for awkward cuts and the odd chipped edge.
Painting the panels: one colour or a contrast
Painting the panels and the wall the same colour gives the calmest result. The shadows in the grooves do the work, and the room looks tailored rather than decorated, which suits a bedroom where the aim is rest. A contrast, such as deep green or charcoal on the panels against a pale wall above, makes the panelling the feature. It also shows every uneven joint, so the filling and caulking need to be tidy. A middle route works in plenty of homes: keep the wall pale and take the panels one or two shades deeper. Sheen changes the effect as well. Matt or eggshell hides small flaws, while satin picks out each profile more crisply. Prime the panels before fitting if you can, fill the joints and nail holes afterwards, then give the final coats. Test any colour on a large board, in daylight and by lamplight, before you commit the whole wall.
Bedroom panelling ideas that work in a rented home
Renting changes how you fix panelling, not whether you can have it. Shelter England’s advice on improving a rented home is blunt: do not make improvements without your landlord’s permission, and get the agreement in writing first. Skip that step and your landlord may ask you to undo the work or hold on to your deposit. Some landlords agree on condition that the wall is put back as it was when you leave. Two options avoid the problem. A freestanding headboard, tall and slatted or framed in panels, stands on the floor against the wall with no fixings into plaster. Or paint the effect: mark the frames in pencil with a spirit level, mask the edges and paint the rectangles in a second tone. It is shallower than real moulding, but simple to repaint. Whichever route you take, email your landlord with the style, the height and how you will restore the wall, and wait for a written yes before you buy anything.